expr:class='"loading" + data:blog.mobileClass'>
Showing posts with label 21 Day Fix Approved Recipes. Show all posts

Sunday, May 15, 2016

Cauliflower Crust Pizza

How to Make Cauliflower Crust Pizza

**This is a 1 minute HOW TO video**

I was so amazed by how tasty this pizza crust turned out to be!! It was crispy and delicious... I really felt like I was cheating! I highly recommend that you try this one!  My kids even enjoyed it too!

Above is a HOW TO Video for you to watch and you can find the recipe below.

Ingredients for Crust Only: 

1 head of fresh cauliflower
1 cup mozzarella cheese
1 tablespoon minced garlic
2 tbsp grated parmasan cheese
1 tsp sea salt
1 tsp black pepper

Directions:

Cut up your cauliflower into bite sized pieces. 

Steam the cauliflower in the microwave for about 5 mins and drain the water.  It is very important to get as much water off of the cauliflower as you can. 


Add the eggs, mozzarella and parmasan cheeses, sea salt, garlic, and black pepper and blend.


Spread the mixture onto a pizza pan and bake in the oven at 400 degrees for about 20 mins.


While the crust is baking, go ahead and fry up your turkey bacon!


After the crust comes out of the oven, top with pizza sauce and your favorite HEALTHY toppings.  I used fresh tomatoes, mushrooms, and summer squash. Oh, and of course turkey bacon!  


Bake the pizza with the toppings on it for another 15 minutes at 400 degrees!  Voila! Done... and so easy!! ENJOY!!


This dish is perfect to make for meal prep Sunday and eat for the rest of the week!  That is what I like to do!!
Meal Prep Sunday


Would you like to join my next FREE healthy eating and fitness challenge??  Just fill out the below form and let's get started!


Sunday, May 1, 2016

Baked Asparagus "Fries"

Baked Asparagus "Fries"


These are absolutely amazing and definitely a must try recipe!! Enjoy!

Instructions: 


1. Preheat your oven to 425°F. Dredge the asparagus in the flour.

2.  Dip the dredged asparagus in the beaten egg. 


3.  Coat the asparagus with a mixture of the panko breadcrumbs, Parmesan, salt, and pepper. 


4.  Transfer to a wire rack set on a baking sheet.


5.  Bake until golden brown, about 7 to 13 minutes. Serve immediately.


Would you like to join my next FREE healthy eating fitness challenge?? Just fill out the below form and let's get started!!


Tuesday, April 19, 2016

Healthy Ranch Dressing - Fix Approved

Healthy Ranch Dressing -- 21 Day Fix Approved!


I just LOVE ranch dressing, so I really had to figure out a way that I could eat it on the 21 Day Fix meal plan!  I love to dip almost anything and everything in ranch and it is by far the most superior salad dressing in existence! So, I had my work cut out for me to find a tasty and healthy alternative to Ranch dressing that was Fix Approved.  Well, look no further because here it is....

Simple and Easy.....

1/3 cup non fat plain Greek yogurt
1/3 cup lowfat buttermilk
1 tbsp ranch seasoning

Now, it really doesn't get much simpler than that, now does it??

I like to make my own ranch seasoning, but you can use any store bought brand.  In the spirit of eating clean, I do make my own. I do oftentimes quadruple the below recipe to make a larger batch and I store it in old spice bottles that have been emptied. Here is my recipe for the seasoning:

1 tsp garlic powder
1 tsp onion powder
1 tsp sea salt
1/2 tsp black pepper
1/2 tsp parsley
1/2 tsp dill

That's it! That is all there is to it!! Now.... Go forth and dip!!! Enjoy!!

Would you like to join in my next FREE healthy eating fitness challenge? Just fill out the below form and let's get started!!


Friday, April 1, 2016

Roasted Chick Peas

Fix Approved Roasted Chick Peas


One of my biggest struggles is my constant need to snack!!  Whether it be sitting at my desk or at night on the couch watching TV... all I want to do is snack and snack and snack some more!! Needless to say, I am always on the lookout for sweet and salty snacks that will actually taste like a snack (I’m looking at you veggies). That is why these roasted chickpeas are PERFECT! This one lets you actually feel like you are really indulging in a delicious snack!! Really satisfies the urge for popcorn and chips!! They have everything you want in a recipe:

  • cheap
  • easy
  • fast
  • scrumptious

These are best made with cooked chickpeas, but can also be made with canned (I actually used canned in these pictures). If you are going to use canned chick peas, please make sure you get a brand with no added sodium. Cooked chickpeas do actually have more nutrients than canned chick peas.


You can flavor these with almost anything! I am sharing 2 recipes here (Garlic Parmesan and Honey Cinnamon - Honey cinnamon chick peas are pictured, fyi) but the possibilities are endless. Just use the base recipe and go from there! Here are just a few other ideas that would be tasty: Soy Sesame, Taco, Peanut Butter and Salt and Vinegar.
It’s imperative that you let these dry after cooking, or after rinsing from the can. The wetter they are the less crunchy they will be and their crunchiness is definitely the draw.... what tricks your mind into thinking that you are eating potato chips or peanuts!! 

After they cool from the oven, they become slightly crunchier. So, take them out of the oven just before you think they are perfect. Also, some may jump and pop around when in the oven (like popcorn)...It’s surprising and can catch you off guard, lol! You have been warned! :)


21 Day Fix Approved Roasted Chick Peas


Ingredients:

4 cups cooked chickpeas or 2 cans of chickpeas
2 tbsp olive oil
seasonings (see below)

Instructions:

  1. Preheat oven to 425 degrees.
  2. Rinse chickpeas (if using canned) and lay on and cover with paper towels to dry.
  3. Place parchment paper on cookie sheet and spread dry chickpeas on it.
  4. Roast chickpeas in the oven for 35 minutes, shaking around half way through.
  5. Remove from oven and immediately put into a bowl.
  6. Mix with oil and seasonings until all chickpeas are covered.
  7. Spread back out on cookie sheet and roast for 5 more minutes.
  8. Take one chick pea out of oven, let cool, and taste. If it's just almost crunchy enough, remove all from oven and allow to cool.
  9. Store in an airtight container for up to 4 days.
Seasonings:

Garlic Parmesan: 1/4 cup grated parmesan cheese, 2 tsp garlic powder, 1/2                              tsp salt
Honey Cinnamon: 1.5 tsp cinnamon, 1/8 tsp nutmeg, 1/4 tsp salt, 2 tbsp                                  honey


21 Day Fix Container Count:    

Yellow: 1 (chickpeas) 
teaspoon: 1 (olive oil) 


Do you want to join my next FREE fun fitness and clean eating group?  Just fill out the below form:


Sunday, March 20, 2016

Frozen Blueberry Bites


I LOVE Greek Yogurt…I LOVE blueberries…and I LOVE frozen stuff. :-)

So, that is why this recipe is the perfect pairing of two great tastes and even better... it is a a perfect 21 Day Fix approved snack!  Putting these little babies together is about as simple as it gets…although a tad time-consuming.


Here’s how to make your own Frozen Yogurt-Covered Blueberry Bites:

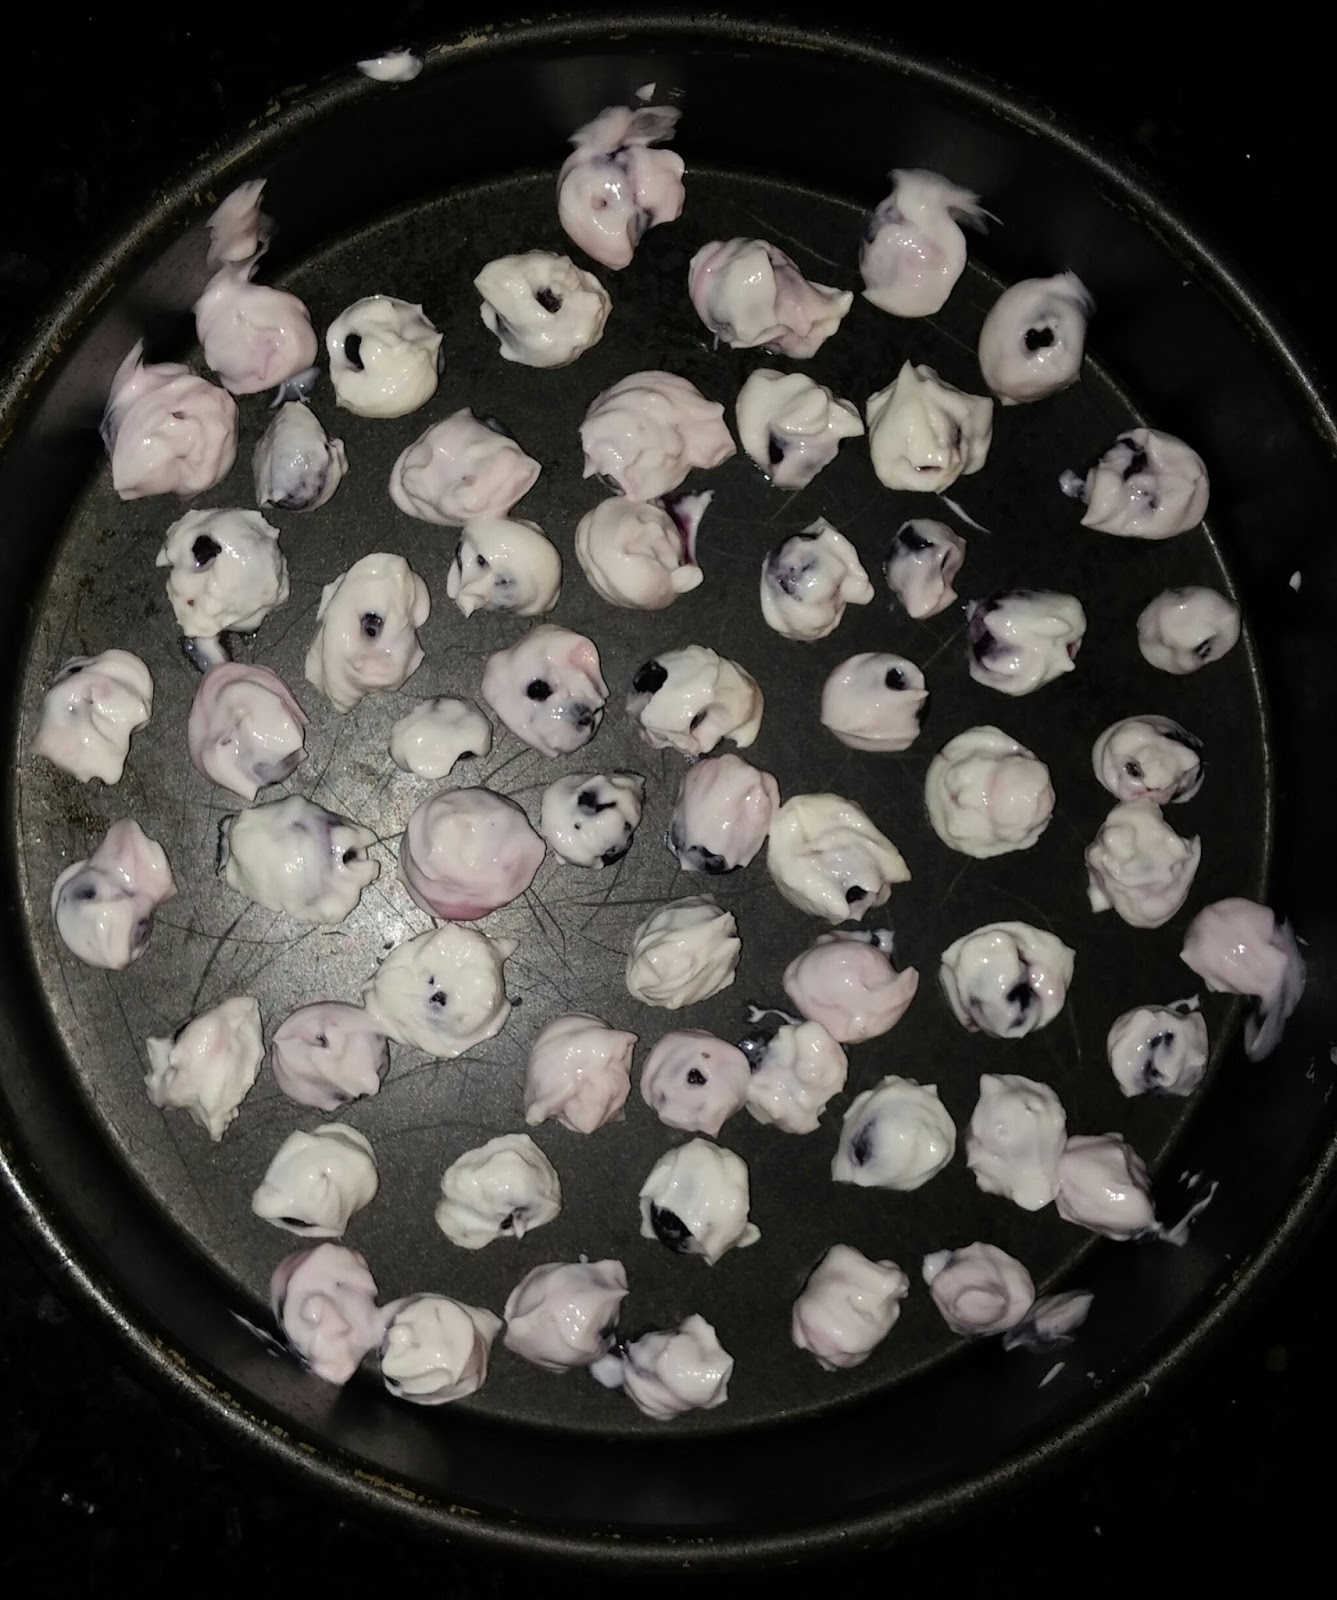
Stick a berry with a bamboo skewer (a toothpick would work too) and dip/swirl it in the yogurt. Then ease it off the end of the skewer and onto a cookie sheet. It’s easier to do this if you just barely stick the berry onto the skewer.


Keep dipping and swirling until all of the blueberries are gone or you run out of yogurt …and put them in the freezer. I couldn’t believe how FAST these things froze! Literally like 10 or 15 minutes. But I would recommend leaving them in for an hour initially and then pop them off the cookie sheet and into a plastic container or baggie.


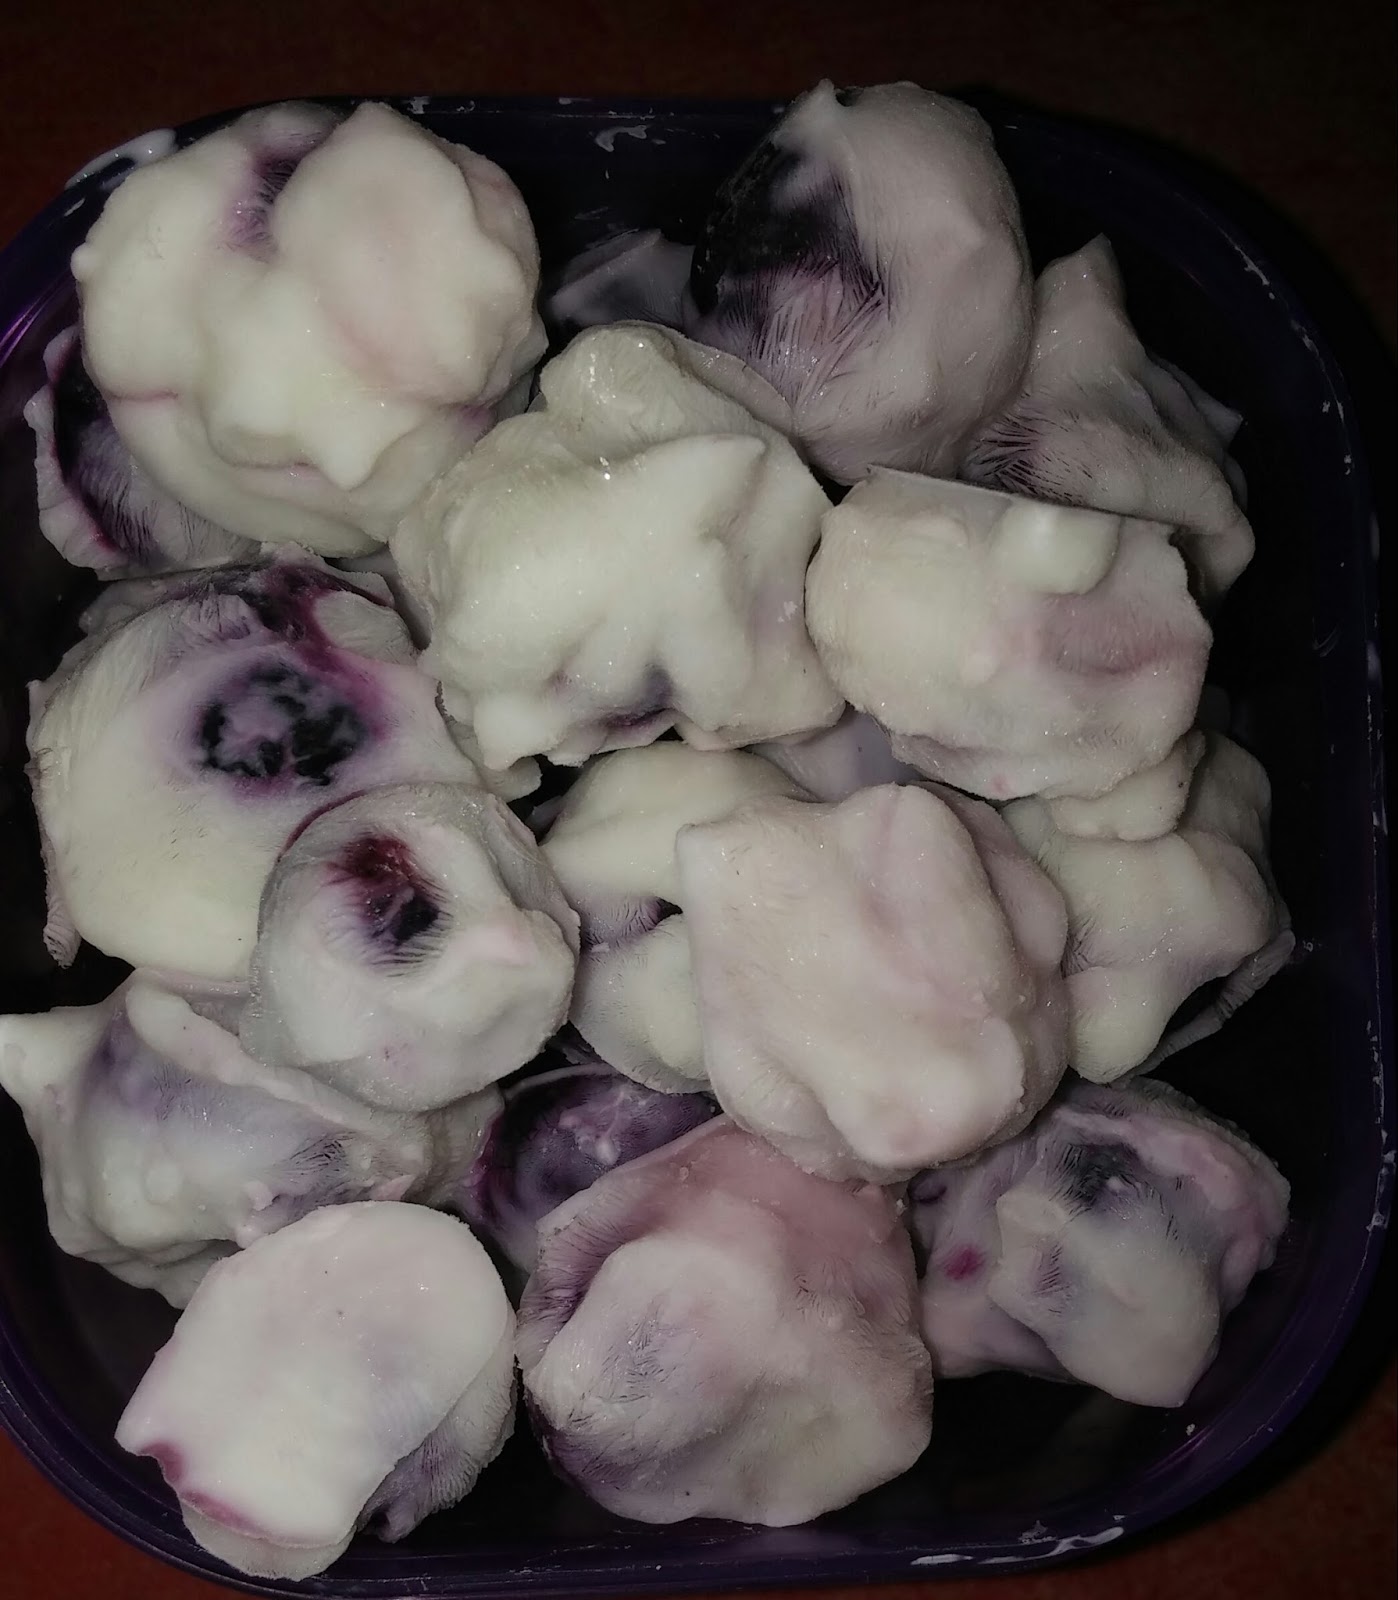
Look how many blueberry bites I was able to make with one little carton of blueberries!


Ohhhh…and the taste!! I can only describe them as cold and creamy with a surprise tart and juicy center! Soooooo good!

Definitely MY kind of treat!  I  hope it will be yours too! :-)


21 Day Fix Container count: 1 red, 1 purple


Learn how I lost 25 pounds in 2 months!  Click below
to register for my FREE five day sneak peek group where I will explain every step of how I lost 25 pounds using the 21 Day Fix program AND I will share ALL of the secrets that I learned along the way that have proven to be game changers for me!   I will break this process down for you step by step so that you can easily incorporate the pieces into your own daily life to reach YOUR goals!

Learn More


Do you want to join my next FREE fun fitness and clean eating group??? Just fill out the below form:


Garlic Parmesan Roasted Broccoli Bites

Garlic Parmesan Roasted Broccoli Bites


These roasted broccoli florets come together with just 5 min prep, tossed in Parmesan-garlic goodness. Plus, it’s the perfect and easiest side dish to any meal!


Every bite was so worth it...So garlicky... And just so crisp and crunchy! YUM!!


Prep Time: 5 minutes
Cook Time: 10 minutes

Total Time: 15 minute


Ingredients
  • 24 ounces broccoli florets*
  • 3 tablespoons olive oil
  • 4 cloves garlic, minced
  • Kosher salt and freshly ground black pepper
  • 1/4 cup grated Parmesan
  • Juice of 1 lemon


Instructions
  • Preheat oven to 425 degrees F. Lightly oil a baking sheet or coat with nonstick spray.
  • Place broccoli florets in a single layer onto the prepared baking sheet. Add olive oil and garlic; season with salt and pepper, to taste. Gently toss to combine.
  • Place into oven and bake for 10-12 minutes, or until tender.
  • Serve immediately, sprinkled with Parmesan and lemon juice.


Notes: *24 ounces broccoli florets is equal to about 5 cups.

Do you want to join my next FREE fun fitness and clean eating group? Just fill out the below form:


Tuesday, February 23, 2016

Fudgy Avocado Brownies

FUDGY AVOCADO BROWNIES


Avocado brownies??? What?!?!? Not only do avocados add a boost of healthy fats, they also intensify the flavor of chocolate and make these brownies ultra rich, and decadent. These gluten-free treats are so fudgy and moist, you won’t even remember how healthy they are! Additionally, one brownie only counts as
1/2 yellow container and 2 tsp on the 21 Day Fix diet! Now, that is my kind of treat!

Total Time: 51 min.
Prep Time: 15 min.
Cooking Time: 36 min.
Yield: 16 servings, 1 brownie each

INGREDIENTS:
Nonstick cooking spray
1 medium ripe avocado, mashed
¼ cup extra-virgin coconut oil, melted
1 large egg, lightly beaten
½ cup pure maple syrup
1 tsp. pure vanilla extract
¾ cup unsweetened cocoa powder
½ tsp. sea salt (or Himalayan salt)
¼ cup gluten-free flour
⅓ cup dark chocolate chips


PREPARATION:
1. Preheat oven to 350° F.
2. Line an 8 x 8-inch baking pan with aluminum foil. Lightly coat with spray. Set aside.
3. Combine avocado, oil, egg, maple syrup, and extract in a medium bowl; mix well. Set aside.
4. Combine cocoa powder, salt, and flour in a medium bowl; mix well.
5. Add cocoa powder mixture to avocado mixture; mix well.
6. Add chocolate chips; mix until blended.
7. Pour batter into prepared pan; spread to make even.
8. Bake for 33 to 36 minutes, or until toothpick inserted in center comes out clean.
9. Cool for an hour before removing from pan. Cut into 16 squares.

21 Day Fix Container Count: ½ Yellow 2 tsp.


Do you want to join my next FREE fun fitness and clean eating group?  Just fill out the below form:


Sunday, February 14, 2016

Sweet Potato Crust Pizza

Sweet Potato Crust Pizza - 

21 Day Fix Approved


My kids and my husband will even eat this crust!  It is delicious for the entire family!

Container count: 2 slices - crust = 1 yellow, 1 blue  (toppings = 1 green, 1/2 red)

Ingredients:

1 1/2 cups mashed sweet potatoes (about 2 medium potatoes)
1 1/2 cups almond flour (other flours would probably work too)
2 large eggs
1 large egg white
1 cup shredded mozzarella cheese
1 tsp baking powder
2 tsp garlic powder
1 tsp oregano
1/2 tsp curry powder
1/2 tsp paprika
1 tsp sea salt
**Your choice of pizza toppings

Directions:

1. Preheat oven to 375 degrees.
2.  Combine all ingredients in a large bowl and mix well.
3.  Coat pan with non-stick cooking spray.
4.  Using a spatula, spread the dough evenly into a large circle about 1/2 inch      thick.
5.  Bake for 25-30 mins until center is firm and edges are lightly browned.
6.  Remove crust from the oven, add desired toppings, and bake for another 
     5-7 minutes until cheese is melted.

Slice pizza and enjoy!!

pizza crust

pizza before baking

You can top your pizza however you like!  This one is topped with chicken, roma tomatoes, mushrooms, onions, green peppers, squash, and spinach! Delicious!! I can't believe that I am not cheating!


Do you want to join my next FREE fun fitness and clean eating group?  Just fill out the below form:


Saturday, February 13, 2016

Homemade Salsa

Homemade Salsa


Ingredients: 
2 medium tomatoes (fresh and diced, used for texture)
1 can diced tomatoes
2 cloves garlic
1 tbsp fresh cilantro
3/4 tsp cumin
1/2 tsp salt
1/2 tsp pepper
2 tbsp lime juice
1/4 small onion (optional)


Instructions:
Combine and mix all ingredients in a medium bowl. Chill before serving.  If you like it less chunky, then just puree in a blender to desired thickness and texture.  You can also add jalapeno peppers or other hot peppers of your choice to give this salsa a kick if you like it HOT!!


Enjoy!

Container count:  1 purple = salsa


Would you like to join my next FREE clean eating fitness challenge? 

Crock Pot Salsa Chicken for Tacos

Crock Pot Salsa Chicken for Tacos

This is so super easy for busy moms to create a meal that the entire family will absolutely LOVE!! Best of all, you can stick to your 21 day fix eating plan and feed the family a delicious meal at the same time!  There are several variations to this dish:


1. The Easiest Way, but not 100% clean

Simply put 4 frozen chicken breasts in the crock pot and pour a jar of salsa on top of the chicken.  Cook in the slow cooker for 8 hrs on low or 4 hours on high.  The chicken will shred easily with a fork and the consistency is PERFECT for tacos or taco salad!

2.  Super Clean version

Ingredients:
2 pounds chicken breast, boneless and skinless
1 cup fresh salsa, homemade or purchased (not from a jar) 
*get homemade salsa recipe
1 cup diced tomatoes
2 tbsp taco seasoning
1 cup onions, diced

Directions:
Place the chicken in the slow cooker and sprinkle with taco seasoning.  Layer the onions, tomatoe, and salsa on top of the chicken.  Pout 1/2 cup water over the mixture.  Cook for 6-8 hours on low.  The chicken will shred easily with a fork when done. 


Now, let's talk about the taco seasoning.... an Old El Paso packet, for example, is loaded with additives that are very unhealthy and not good for your body to include MSG and maltodextrin.  Maltodextrin has been shown to suppress the "good" bacteria in your stomach increasing your risk for autoimmune disease.  Additionally, maltodextrin does affect blood sugar with a very high glycemic index of 130! (Note to diabetics)  The best way to avoid this additive is to avoid processed foods alltogether.  I make my own taco seasoning as described above. It is really simple and easy to do.  I usually quadruple this recipe to make a large batch at one time and I like to store mine in old, empty spice bottles.  

You can use this easy salsa chicken to make excellent tacos or a fantastic taco salad!  With 21 day fix, you can have either one whole wheat flour tortilla or two corn tortillas.  When I serve this to the family, I usually also serve crunchy taco shells because some of my kids prefer hard tacos while some prefer the soft tacos.  


I like to top my tacos with 1/2 blue container of cheese and 1/2 blue container of avocado.  I also like to top with 1-2 tsp of nonfat plain greek yogurt (which serves as an alternative to sour cream.)  We eat this at least once every two weeks because we all love it so much!  Best of all, I use the left over chicken to top salad greens for the next couple days... it makes a teriffic chicken taco salad. I like to add a yellow container of black beans when I eat it as a salad.  YUM!!! 

Variation:  You could also add pinapple to have a pineapple salsa chicken to mix it up a little!  Just be sure to count your purple container!


Do you want to join my next FREE fun fitness and clean eating group?  Just fill out the below form:


Ranch Chicken and Rice Bake

Ranch Chicken and Rice Bake


Ranch Chicken and Rice Bake - This was my first time making this recipe, but the family decided that this was definitely a KEEPER!!  Everyone just loved the flavor of the rice and served themselves a second helping of just the rice. Additionally, this recipe is 21 Day Fix Friendly and the best part was that I put the dish together when I got home from work and then I got my workout completed while it baked in the oven! BAM!  Killed two birds with one stone!  I know all you busy working moms can appreciate that!!

 Container count per serving: 1 red, 1 yellow, 1 orange

 TOTAL TIME: Prep: 10 min. Bake: 35 min


 Ingredients:
 2 cups uncooked instant rice
 1-1/2 cups 2% milk
 1 cup water
 1 envelope ranch salad dressing mix*
 1 pound boneless skinless chicken breasts, cut into 1/2-inch strips
 1/4 cup butter, melted
 Paprika

 Directions:
 Place rice in a greased shallow 2-qt. baking dish. In a small bowl, combine the milk, water and salad dressing mix; set aside 1/4 cup. Pour remaining mixture over rice. Top with chicken strips. Drizzle with butter and reserved milk mixture.
 Cover and bake at 350° for 35-40 minutes or until rice is tender and chicken is no longer pink. Sprinkle with paprika.

*To be a truly "clean" recipe, you can use your own ranch seasoning mix rather than a ranch packet.  Ranch seasoning is very easy to make and I usually make a jar full in one batch so that I always have some on hand.  

Ranch Seasoning (21 Day Fix Approved):

1 tsp garlic powder
1 tsp onion powder
1 tsp sea salt
1/2 tsp pepper
1/2 tsp parsley
1/2 tsp dill

Note: I usually quadruple this recipe to make a larger batch.  I like to store my seasoning mixes in old spice jars that I have emptied.

Enjoy this kid-tested, family approved recipe that is healthy and delicious!!  I served it with green beans and Hawaiian sweet rolls. 

Would you like to join my next FREE clean eating fitness challenge?

 [

Sunday, February 7, 2016

21 Day Fix Approved Chocolate Peanut Butter Cups -- A Healthy Treat!


This recipe is kid tested and husband approved!  My kids beg me to make this!!  When you are craving chocolate, this is a perfect snack to endulge in... And it is such an excellent way to incorporate the healthiest meal of the day, Shakeology, into your mealplan!

WHAT YOU WILL NEED (this will make 8 peanut butter cups)


  • 4 tablespoons of coconut oil
  • 8 tablespoons of chocolate Shakeology
  • 4 teaspoons of natural peanut butter


Place 2 tablespoons of coconut oil in a microwave safe bowl. Microwave for 30 seconds until the coconut oil is liquefied. Stir in 4 tablespoons of chocolate shakeology. Divide the chocolate mixture evenly between 8 spots in a mini muffin tin. Place in the freezer for 5 minutes.

Pull the muffin tray out of the freezer. Place a half a teaspoon of peanut butter on top of each chocolate disk. Spread the peanut butter evenly over the hardened chocolate with a knife.

Melt the remaining 2 tablespoons of coconut oil in the microwave. Stir in the remaining 4 tablespoons of chocolate Shakeology in. Use this to pour on top of the peanut butter layer. **You will want to do this in 2 batches so it doesn’t harden up on you while the first layer of chocolate is hardening in the freezer.

Place the muffin tin back in the freezer and leave it in there for at least 30 minutes.  The chocolate cups will slide easily out of the tin. Keep the cups stored in the fridge or freezer for the best consistency! 

Related Posts:  What is Shakeology?

Would you like to join me in my next clean eating fitness FREE challenge group??


Would you like to learn more about Shakeology or try some Shakeology samples?